

Sliding Lid Box Wood: Dimensions and Fit-Tuning Guide
Posted: October 29, 2026 in #Wood Nerds
Key takeaways
- Cut the lid channel to the measured plywood thickness plus 0.010-0.015" clearance per side, never the nominal label thickness.
- Set channel depth to about half the wall thickness plus 1/32" so the lid bottoms out before the walls do.
- Baltic birch is the default stock because its multi-ply edges hold a crisp, flat-sliding channel; solid wood moves with humidity and can bind.
- Cut a two-inch test stub of the channel from the same sheet before committing a full box, and adjust clearance in 0.1 mm (laser) or 0.005" (CNC) steps.
- Acrylic lids need roughly double the wood clearance, about 0.015-0.02" per side, because laser-cut edges taper and the material has no compression give.
Build a sliding lid box from Baltic birch or plywood with exact numbers instead of trial and error: channel depth equals lid thickness plus 0.5 mm clearance, channel width equals lid thickness plus a kerf-dependent fit allowance, all laid out on a printable, dimensioned template. This guide covers wood choice, lid-channel geometry for table saw, CNC, and laser, and a fit-tuning table so the lid slides smoothly on the first cut.
What Is a Sliding Lid Box and Which Styles Sell?
A sliding lid box has two parts: a four-walled carcass and a lid that rides in channels cut into the walls. No hinges, no hardware. The style you pick determines whether you cut it on a table saw, a laser, or a 4x8 CNC.
Japanese sliding lid box vs. simple channel lid
Japanese-style boxes (kiridame) use tight-fitting channels and thin stock, often with visible joinery on the corners. A simple channel lid is the same mechanic with looser clearances, easier to sell and easier to batch. Both start from the same template; only channel depth and clearance change.
| Style | Best tool | Why |
|---|---|---|
| Japanese kiridame | Table saw or laser | Precise, thin channels; hand-fit finish |
| Pencil/trinket box | Laser | Small parts, fast per-unit cuts |
| Wine or gift box | CNC | Larger panels, corner joinery in one setup |
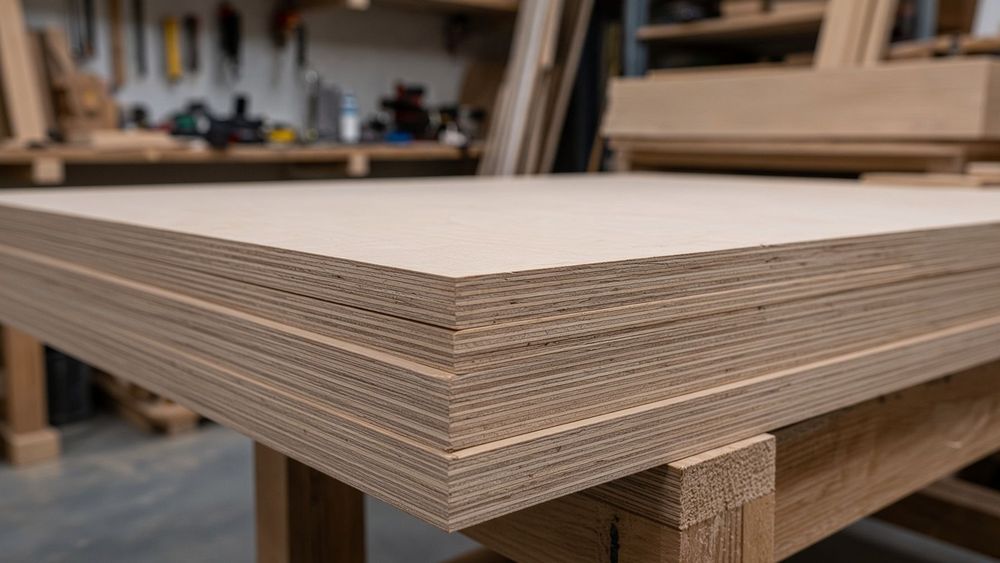
Baltic birch is the default stock, but check actual thickness before cutting channels: nominal 6mm sheets often measure closer to 5.5mm, per the Wood Database's Baltic birch page. Build the lid channel off the measured number, not the label.
Small wooden box sliding lid projects that move on Etsy
Trinket boxes, pencil boxes, and tea organizers dominate because they cut from one half-sheet and ship flat-packed. If you design in a parametric tool like GCrafter, one template resizes across all three (coordinate system basics).
How Do You Choose Wood for a Sliding Lid Box?
Baltic birch vs. MDF vs. hardwood for the lid channel
Baltic birch is the default for a reason: multi-ply edges hold a crisp channel, and the lid slides on a flat, splinter-free surface. MDF cuts cleanly and is cheap, but its edges fuzz under a laser and crush slightly under a lid runner, so channels wear loose faster. Hardwood like maple or walnut looks premium on an Etsy listing, but solid wood moves with humidity, and a lid that slides today can bind in August. For a first build, Baltic birch for the box and lid, hardwood only for the lid face if you want contrast.
Why nominal thickness lies (and how to measure it)
A "1/2 inch" Baltic birch sheet often measures 11.7–12.2 mm, and that spread changes everything. The lid channel must be cut to the measured thickness plus clearance, not the label. Measure with calipers at several points on the actual sheet you're cutting; plywood varies edge to edge. Set the channel depth to about half the wall thickness, and leave 0.2–0.5 mm of lateral clearance so the lid slides without racking. If you're generating the parts parametrically, the lid channel is just another dimension driven by the measured value — the same logic we use when drawing moving parts in the components and part lab.
What Are the Critical Dimensions of a Sliding Lid Box Template?
For 1/4" Baltic birch plywood, the numbers that work across most shops are: channel depth 3/16" (half the lid thickness plus 1/32" so the lid bottoms out before the walls), channel width 0.250" cut with a 1/4" straight bit or a dado stack, lid clearance 0.010"–0.015" per side, and a stop rabbet 1/4" deep so the lid can't slide out the back.
Channel depth and clearance: the numbers that matter
The long paragraph here is the fit-tuning core. Kerf and bit diameter decide your channel width before you touch anything: a 1/4" compression bit in a CNC gives you 0.250" nominal, but a dado stack on a table saw can wander 0.005"–0.010" depending on how the blades shim, and a laser kerfs differently along X than Y on many diode machines. That is why the template should spec the channel as a target width with tolerance, not a fixed number. Cut a test channel in scrap from the same sheet, measure it with calipers, sand or shim the lid to fit. A single-blade pass leaves a rougher wall than a full dado stack, which matters more on the lid's sliding faces than anywhere else in the box; Fine Woodworking covers the dado-stack-versus-single-blade tradeoff in their channel-cutting guide. If you'd rather generate the whole dimensioned template, including kerf compensation per axis, GCrafter exports cut-ready sheets sized to your machine (pricing).
Lid stop and pull-notch geometry
Stop the channel 3/8" short of the front edge and cut a 3/4"-wide, 1/8"-deep thumb notch in the lid's front face. That gives buyers a grip without a handle and keeps the lid captured when the box is tipped.
How Do You Cut the Lid Channels on a Table Saw?
Dado stack vs. multiple passes with a single blade
A stacked dado set is the fast path: two 1/8" blades plus chippers gives you a flat-bottomed channel in one pass, sized exactly to your plywood's actual thickness. Measure the sheet first; 1/2" Baltic birch often runs closer to 12mm, and a sloppy channel means a lid that rattles or binds. No dado stack? Run two or three passes with a single blade, shifting the fence 1/8" at a time, then pare the ridges flat with a chisel. It works, but each panel takes longer and the bottom is rarely as clean.
Positioning the channel: measuring from the top edge
Set the channel's lower face 1/4" down from the top edge of the side panels, so the lid rides with about 1/8" of wood above it. Set blade height to channel depth (typically 3/8" for a 1/2" lid), clamp a stop block to a miter gauge or crosscut sled, and cut both side panels with the same setup so the channels align. If your template came from GCrafter, those edge distances and depths are already dimensioned on the drawing, and the backstory is in the build post.
How Do You Cut a Sliding Lid Box on a CNC or Laser?
Kerf width and why X and Y may differ
On a laser, the beam removes material on both sides of the cut, so every slot comes out wider than drawn. Set kerf compensation in LightBurn or in the design file itself, and check whether your tool supports separate X and Y values. The LCInterlocking FreeCAD add-in supports kerf width but not different values for X and Y, a limitation a LightBurn forum user flagged (https://forum.lightburnsoftware.com/t/looking-for-a-better-box-making-software/163424?page=2). On a CNC router, kerf is your cutter diameter and matters less for slots, but bit deflection on tight finger joints does.
Generating the parts: parametric tools vs. drawing it by hand
Drawing each finger and lid channel by hand in Fusion works once, then every dimension change means redrawing. Parametric tools generate the whole layout from your dimensions: MakerCase and boxes.py handle basic boxes, PanelOrca adds panel-based assemblies, and GCrafter generates finger joints plus lid channels as a cut-ready sheet, with kerf applied per axis. If you're mixing metric sheet goods with inch tooling, it's worth reading getting over the fear of the metric system first.
One honest gap: laser-cut acrylic varies in thickness, and cast acrylic sheet tolerances run loose enough to affect lid slide, so measure your actual sheet before trusting a nominal 3 mm slot.
Which Tool Gets You a Cut-Ready Sliding Lid Box Fastest?
boxes.py and manual adjustment
Boxes.py generates a sliding-lid box fast, and it works for many makers with some manual adjustment afterwards. The SVG output assumes one kerf value, so if your laser or router bit cuts differently across X and Y, the lid channel fit drifts and you edit the file by hand. MakerCase handles finger joints well but gives you plain panels, not a lid that slides in a channel.
Where GCrafter falls short on sliding lids
GCrafter sits between CAD and CAM: you set the box, lid, and channel dimensions parametrically, and it exports a cut-ready sheet with kerf compensation built into each joint. Change the width from 8" to 10" and every tab, slot, and lid channel regenerates, so you are not redrawing anything. Where it falls short: the sliding-lid geometry is fixed to the channel style in the gallery designs, so exotic lid profiles still need CAM work elsewhere. PanelOrca optimizes sheet layouts after you have parts, and Fusion can model anything but demands the parametric setup time first. For a standard sliding lid box, GCrafter is the fastest path from dimensions to G-code or LightBurn-ready SVG.
How Do You Tune the Fit So the Lid Slides Smoothly?
The 10-minute test cut before committing a full sheet
Cut a two-inch-wide stub of each joint from the same sheet before running the full box. Kerf, material thickness, and machine calibration all vary, so a scrap test catches a tight channel for the cost of a few inches of stock. If the lid binds, widen the channel clearance in 0.1 mm steps on a laser or 0.005" on a CNC and re-cut the stub, not the box. Tools like Boxes.py expose a kerf setting per generator, which is where you dial this in before export (see the Boxes.py documentation).
Wax, sandpaper grits, and when to remake a part instead
A channel that binds by a hair responds to 220-grit wrapped on a paint stir stick, then a rub of paste wax or candle wax. If the lid needs more than two light sanding passes, the offset is wrong; remake the part rather than rounding the fingers into a sloppy fit. Wax the channel, not the lid, so the slide wears in instead of gumming up.
Can You Make a Sliding Lid Box in Acrylic or an Unfinished Wood Box for Selling?
Acrylic box sliding lid: clearance and flame-polished edges
Acrylic needs roughly double the wood clearance: 0.015–0.02" per side instead of 0.008", because laser-cut edges have a slight taper and the material has no compression give. Kerf also varies with speed and power settings, so test-cut a lid channel scrap before committing to a full sheet. Flame-polish the lid edges with a torch pass for a glass-clear finish, but skip polishing the channel edges, where added material can tighten the slide.
Finishing an unfinished wood box sliding lid for sale
Sand to 220, then wipe on a hardwax oil or water-based poly; avoid film finishes in the channels, which glue the lid in place. Brand it with a laser-engraved logo on the underside of the lid, where it stays crisp after handling. For Etsy listings, photograph the box open with the lid half-slid, since that shot sells the mechanism.
FAQ
How much clearance should a sliding lid have in its channel?
For wood, aim for 0.010" to 0.015" per side on a 1/4" lid, or 0.2-0.5 mm laterally in metric terms. Acrylic needs roughly double that, 0.015-0.02" per side, because laser-cut edges taper slightly and the material has no compression give. Always cut a test channel in scrap from the same sheet before committing.
What thickness wood is best for a small wooden box with a sliding lid?
Baltic birch at 1/4" (6 mm nominal) is the standard choice for small boxes: multi-ply edges hold a crisp channel and slide flat. Measure the actual sheet with calipers, since nominal 6 mm often measures closer to 5.5 mm. Build the channel depth and width off the measured number, not the label on the sheet.
How do you make the lid slide smoother without sanding the channel wider?
Rub paste wax or candle wax into the channel itself, not the lid, so the slide wears in instead of gumming up. If the binding is only a hair's worth, 220-grit wrapped around a paint stir stick works. If it needs more than two light sanding passes, the offset is wrong; remake the part.
Can I make a sliding lid wine box with the same template?
Yes, with scaled dimensions. Wine and gift boxes are typically cut on a CNC because of the larger panels and corner joinery in one setup, but the channel mechanics are identical: depth set to half the wall thickness plus clearance, width cut to your measured lid thickness, and a stop rabbet so the lid can't slide out the back.